After you have Secure Conversations access, you can click the message bubble icon. If you have unread messages, a red notification appears on the message bubble.
Based on your assigned access in Secure Conversations Features, you can click the message bubble to:
access general and resident-specific conversations.
create conversations.
copy conversations into a progress note.
edit participants.
end conversations.
leave conversations.
read and join conversations.
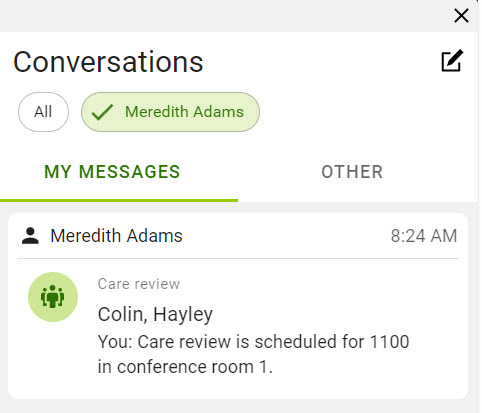
You can access conversations by clicking the Secure Conversations icon in the top right of the screen. Access to general conversations allows you to communicate with other participants or with a defined contact group within the facility. When you are a participant in a general conversation, you can view the conversations under My Messages.
When you have access to read resident-specific conversations from anywhere in the application, but are not added as a participant, the conversations appear under Other.

Resident-specific conversations are conversations between 2 or more users about a specific resident. You must have access to the resident's chart as well as have the appropriate access in Secure Conversations Features for resident-specific conversations. Based on your security access, the type of message is indicated by either the resident icon and name or General.

In the web, when accessing Secure Conversations from any tab on the resident's chart, the inbox messages are automatically filtered for messages about that resident. Filters appear at the top for All and resident name. You can select All to see all messages or select the resident name to view conversations specific to the resident. The filter appears for My Messages and Other, if available.
When you receive a message in Secure Conversations, a red dot appears on the Secure Conversations message bubble in the top right of the screen. You can view and send messages by clicking on the message bubble.
In the top right of the screen, click the Secure Conversations icon.
Select All or resident name, if available.
Select My Messages or Other, if available.
Click the message to review.
Type a message and click the send icon.
General conversations allow staff to communicate with 1 another or with a defined contact group within the facility. You can communicate securely in real-time through the web application and the Secure Conversations iOS or Android mobile apps.
To create a General conversation in the web
In the top right of the screen, click the Secure Conversations icon.
Click the icon to start a conversation.
Select General, if available.
Select a location and click Next.
Type and select the contact group or participant's name.
Click the people icon and select contact groups and participants' names. Click Save.
Type a subject, if needed.
Type a message and click the send icon.
To create a General conversation in Secure Conversations mobile app
Tap the icon to start a conversation.
Select General, if available.
Select a location and tap Next.
Do one of the following:
- Tap Search Contacts and type and select the contact group or participant's name.
- Tap Search Contacts and tap the people icon to select contact groups and participants' names. Tap Save.
5. Type a subject, if needed.
6. Type a message and tap the send icon.
Resident-specific conversations allow staff to communicate with 1 another or with a defined contact group within the facility about a specific resident. You can communicate securely in real-time through the web application and the Secure Conversations iOS or Android mobile apps.
You can start a resident-specific conversation anywhere there is a Secure Conversations message icon. You can create a progress note from the message and save to the resident's chart. Participants in the conversation must have access to the resident and have the resident-specific feature selected for their role.
To create a Resident-specific conversation in the web
In the top right of the screen, click the Secure Conversations icon.
Click the icon to start a conversation.
Select Resident-Specific, if available.
Select location, if available.
Select a resident.
Type and select the contact group or participant's name.
Click the people icon and select contact groups and participants' names. Click Save.
Type a subject, if needed
Type a message and click the send icon.
To create a Resident-specific conversation in Secure Conversations mobile app
Tap the icon to start a conversation.
Select Resident-Specific, if available.
Select a location, if available.
Select a resident.
Tap Search Contacts and type and select the contact group or participant's name.
Tap Search Contacts and tap the people icon to select contact groups and participants' names. Click Save.
5. Type a subject, if needed.
6. Type a message and tap the send icon.
In Conversation Details, you can click or tap Edit to update the contact groups or individual participants in an active conversation. The options available in Conversation Details are dependent on your access selected in Secure Conversations Features.
To add a contact group or individual participant
Click or tap Edit.
In the participants field, type the contact group or participant's name then select from the list.
In the participants list, select contact groups or participants' names.
To remove participants
Click or tap Edit.
In the participants field in the web, click the x next to the participant's name.
In the participants field in the Secure Conversations mobile app, tap the participant's name then the trash icon.
In the participants list, click or tap on the participant's name.
In Conversation Details, select Locations to update the location specific to the active conversation. This affects the list of participants. The options available in Conversation Details are dependent on your access selected in Secure Conversations Features.
Click or tap Locations.
Update the location as needed.
In Conversation Details, you can select Create progress note to turn a resident-specific conversation into a progress note and save it to the resident's chart as a permanent record. The progress note includes all the messages in the conversation and any additional notes added. You can include the progress note on the Shift Report, 24 Hour Report, and the MD/Nursing Communication Report. The options available in Conversation Details are dependent on your access selected in Secure Conversations Features.
Click or tap Create progress note.
If prompted, type your password and click or tap Sign.
Leaving a Conversation
In Conversation Details, you can select Leave conversation to leave the conversation without ending it for other participants. The options available in Conversation Details are dependent on your access selected in Secure Conversations Features.
Steps
Click or tap Leave conversation.
Acknowledge the prompt.
In Conversation Details, you can select End conversation to end and delete the conversation for all participants. The options available in Conversation Details are dependent on your access selected in Secure Conversations Features.
Click or tap End conversation.
Acknowledge the prompt.